A Comprehensive Guide
Introduction
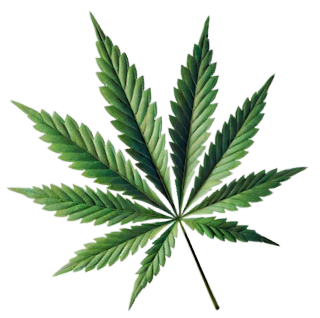
Germinating marijuana seeds is the first and most crucial step in growing healthy cannabis plants. This process, if done correctly, sets the foundation for a successful harvest. In this comprehensive guide, we will explore everything you need to know about germinating marijuana seeds, from choosing the right seeds to the various methods of germination, and the initial care your seedlings will need. Our focus keyword for this article is “germinate marijuana seeds,” and we aim to provide a detailed and SEO-optimized guide that keeps you engaged and informed.
Understanding Marijuana Seeds
Types of Marijuana Seeds
When it comes to marijuana seeds, there are three primary types: regular, feminized, and autoflowering. Understanding the differences between these types is essential for selecting the right seeds for your growing needs.
Regular Seeds
Regular marijuana seeds can produce either male or female plants. Male plants are typically used for breeding purposes, while female plants are preferred for their high cannabinoid content. Regular seeds are less predictable but can be valuable for breeders looking to create new strains.
Feminized Seeds
Feminized seeds are bred to produce only female plants, which are the ones that produce the desired buds. These seeds are ideal for growers who want to ensure a high yield without the risk of male plants.
Autoflowering Seeds
Autoflowering seeds are bred to transition from the vegetative stage to the flowering stage automatically, regardless of light cycles. These seeds are perfect for beginners as they simplify the growing process and have a shorter lifecycle.
Selecting Quality Seeds
Quality seeds are vital for a successful germination process. Here are some tips for selecting the best seeds:
- Appearance: High-quality seeds are usually dark brown, gray, or black with a glossy finish. Avoid seeds that are green or white as they are likely immature.
- Feel: Seeds should feel hard and firm. If they crack easily under pressure, they are not viable.
- Source: Purchase seeds from reputable breeders or seed banks to ensure genetic stability and quality.
The Germination Process
What is Germination?
Germination is the process by which a seed develops into a new plant. For marijuana seeds, this involves the seed absorbing water, swelling, and eventually splitting open to allow the root (radicle) to emerge.
Conditions for Successful Germination
For marijuana seeds to germinate successfully, they require the following conditions:
- Moisture: Seeds need to be kept moist but not waterlogged. Too much water can suffocate the seed, while too little will prevent germination.
- Warmth: The ideal temperature for germinating marijuana seeds is between 70-85°F (21-29°C).
- Darkness: Seeds germinate best in a dark environment.
- Air: Seeds need access to fresh air to breathe. Good airflow prevents mold and mildew.
Methods of Germination
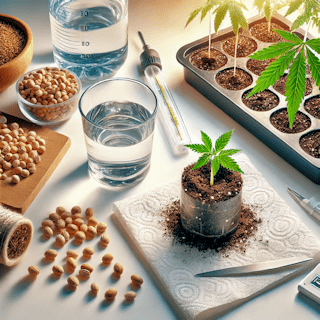
There are several methods to germinate marijuana seeds, each with its advantages and disadvantages. Here are the most popular methods:
Paper Towel Method
The paper towel method is one of the most commonly used techniques for germinating marijuana seeds.
- Materials Needed:
- Paper towels
- Two plates
- Water
- Steps:
- Wet the paper towels and wring out excess water.
- Place the seeds between the damp paper towels.
- Put the paper towels between two plates to create a dark, moist environment.
- Check the seeds daily, keeping the towels moist until the seeds sprout.
Soaking Method
The soaking method involves placing seeds in water to encourage germination.
- Materials Needed:
- Glass of water
- Steps:
- Fill a glass with water at room temperature.
- Drop the seeds into the glass.
- After 24-48 hours, the seeds should have cracked open, and you may see a small root.
Direct Planting
Direct planting is a method where seeds are planted directly into the growing medium.
- Materials Needed:
- Growing medium (soil, coco coir, etc.)
- Pots
- Steps:
- Fill pots with the growing medium.
- Plant the seeds about ¼ inch deep.
- Keep the soil moist and maintain a warm environment.
Starter Cubes and Plugs
Starter cubes and plugs provide a convenient and effective way to germinate seeds.
- Materials Needed:
- Starter cubes (e.g., rock wool, peat pellets)
- Water
- Steps:
- Soak the starter cubes in water.
- Place the seeds in the pre-made holes of the cubes.
- Keep the cubes moist and maintain a warm environment until the seeds sprout.
Caring for Seedlings
Once your marijuana seeds have germinated, it’s crucial to care for the young seedlings properly to ensure they develop into healthy plants.
Transplanting Seedlings
When the seedlings have developed their first set of true leaves, it’s time to transplant them into their final growing medium.
- Prepare the Growing Medium: Choose a high-quality soil or hydroponic medium.
- Transplant Carefully: Gently remove the seedlings from their initial germination medium and place them into the new pots, ensuring the roots are well-covered.
- Watering: Water the seedlings thoroughly after transplanting and keep the soil consistently moist.
Providing Light
Seedlings need plenty of light to grow strong and healthy. Here are some lighting tips:
- Light Intensity: Use grow lights designed for seedlings, such as fluorescent lights or LED grow lights, to avoid burning the young plants.
- Light Duration: Provide 18-24 hours of light per day during the seedling stage.
- Distance from Light: Keep the lights about 2-3 inches above the seedlings to encourage strong growth without causing heat stress.
Nutrient Requirements
Seedlings have different nutrient needs than mature plants. Here’s how to provide the right nutrients:
- Start with Plain Water: For the first week, use plain water to avoid nutrient burn.
- Diluted Nutrient Solution: After the first week, start feeding with a diluted nutrient solution designed for seedlings.
- Gradual Increase: Gradually increase the nutrient strength as the seedlings grow.
Monitoring and Troubleshooting
Regular monitoring is essential to catch any issues early and ensure healthy growth.
- Check for Pests: Look for signs of pests such as discoloration, holes in leaves, or webbing.
- Monitor Growth: Ensure the seedlings are growing steadily and uniformly. Slow growth may indicate nutrient deficiencies or environmental issues.
- Adjust Environment: Maintain optimal temperature and humidity levels to support healthy seedling growth.
Common Germination Problems and Solutions
Even with the best care, you may encounter some problems during the germination process. Here are common issues and how to solve them:
Seeds Not Germinating
If your seeds are not germinating, consider the following factors:
- Old or Poor-Quality Seeds: Ensure you are using fresh, high-quality seeds.
- Incorrect Moisture Levels: Ensure the germination medium is moist but not waterlogged.
- Temperature Issues: Maintain a consistent temperature between 70-85°F (21-29°C).
Seedlings Damping Off
Damping off is a fungal disease that affects young seedlings, causing them to wilt and die.
- Solution:
- Ensure good air circulation.
- Avoid overwatering.
- Use sterile growing medium and equipment.
Seedlings Stretching
Seedlings may stretch and become leggy if they do not receive enough light.
- Solution:
- Move the lights closer to the seedlings.
- Ensure the seedlings receive 18-24 hours of light per day.
Advanced Germination Techniques
For experienced growers, advanced germination techniques can enhance success rates and plant health.
Scarification
Scarification involves lightly sanding the seed coat to improve water absorption and germination rates.
- Materials Needed:
- Sandpaper
- Steps:
- Gently rub the seed coat with sandpaper.
- Proceed with your chosen germination method.
Stratification
Stratification involves exposing seeds to cold temperatures to mimic winter conditions, breaking seed dormancy.
- Materials Needed:
- Refrigerator
- Moist paper towel
- Plastic bag
- Steps:
- Place the seeds in a moist paper towel.
- Put the paper towel in a plastic bag.
- Store the bag in the refrigerator for 1-2 weeks.
- Proceed with your chosen germination method.
Preparing for Germination: The Pre-Germination Checklist
Before you start germinating your marijuana seeds, it’s essential to ensure you have everything prepared. This section will cover all the necessary preparations to set the stage for successful germination.
Selecting the Right Location
Choosing the right location for germination is crucial. The area should be:
- Warm: Maintain a temperature between 70-85°F (21-29°C).
- Dark: Seeds germinate best in a dark environment.
- Clean: Ensure the area is clean to prevent mold and pests.
Gathering Materials
Make sure you have all the necessary materials ready. This includes:
- Seeds: High-quality marijuana seeds.
- Germination Medium: Paper towels, water, plates, or starter cubes.
- Containers: Glass for soaking method or pots for direct planting.
- Labels: To keep track of different strains if you are germinating multiple varieties.
Germination Methods in Detail
Paper Towel Method
The paper towel method is widely regarded for its simplicity and effectiveness.
- Monitoring:
- Check the seeds daily to ensure the paper towels remain damp. Add water as necessary.
- After 2-7 days, you should see the seeds crack open and small white roots, known as radicles, emerging.
- Transplanting:
- Once the roots are about ½ to ¾ inch long, carefully transfer the seeds to your chosen growing medium.
- Plant the seeds root-down about ¼ inch deep and lightly cover with soil or other medium.
Soaking Method (Continued)
The soaking method can speed up the germination process by softening the seed coat.
- Monitoring:
- After 24-48 hours, the seeds should start to crack open. If they haven’t, give them a gentle stir in the water and wait another 24 hours.
- Once you see the seeds crack open and a small root appear, they are ready to be planted.
- Transplanting:
- Carefully remove the seeds from the water using a spoon or tweezers.
- Plant the seeds about ¼ inch deep in your growing medium, ensuring the root is pointing downwards.
Direct Planting (Continued)
Direct planting mimics the natural germination process, reducing transplant shock.
- Planting Depth:
- Plant the seeds about ¼ inch deep. Cover lightly with soil and gently water.
- Keep the soil consistently moist but not waterlogged.
- Environment:
- Maintain a warm, humid environment to encourage germination.
- Consider using a humidity dome to retain moisture and warmth.
Starter Cubes and Plugs (Continued)
Starter cubes and plugs are designed to provide the perfect environment for germination.
- Placement:
- Place the soaked starter cubes in a tray and insert a seed into each cube’s pre-made hole.
- Lightly cover the seeds with a small piece of the cube material or perlite.
- Environment:
- Keep the cubes moist and maintain a warm environment.
- Use a humidity dome to create a controlled environment.
- Transplanting:
- Once the roots start growing out of the cubes, transplant them into their final growing medium.
Post-Germination Care
Providing Light
Light is crucial for seedlings’ development. Without sufficient light, seedlings can become weak and leggy.
Light Types
- Fluorescent Lights (CFLs): These are inexpensive and produce less heat, making them ideal for seedlings.
- LED Grow Lights: Energy-efficient and long-lasting, providing full-spectrum light.
- HID Lights (MH and HPS): More powerful but generate more heat, suitable for larger setups.
Light Duration
- Seedling Stage: Provide 18-24 hours of light per day to encourage strong growth.
- Distance: Keep the lights about 2-3 inches above the seedlings to avoid burning.
Watering Seedlings
Proper watering is essential to avoid damping-off disease and other issues.
- Frequency: Water the seedlings whenever the top inch of the soil feels dry.
- Method: Use a spray bottle to mist the soil lightly to avoid disturbing the young roots.
- Drainage: Ensure the pots have good drainage to prevent waterlogging.
Nutrient Requirements
Seedlings have delicate root systems and require gentle feeding.
- Initial Feeding: Use plain water for the first week to avoid nutrient burn.
- Diluted Nutrients: After the first week, start feeding with a diluted nutrient solution.
- Frequency: Feed the seedlings every other watering, gradually increasing the nutrient strength.
Monitoring and Troubleshooting
Regular monitoring helps catch issues early and ensures healthy growth.
Signs to Watch For
- Yellowing Leaves: May indicate nutrient deficiencies or overwatering.
- Wilting: Can be a sign of underwatering, overwatering, or root issues.
- Stunted Growth: Often caused by inadequate light or nutrient imbalances.
Solutions
- Adjusting Light: Ensure the seedlings receive adequate light and adjust the distance as they grow.
- Nutrient Adjustments: Modify the nutrient solution based on the seedlings’ response. Use a balanced nutrient formula specifically designed for seedlings.
- Environmental Control: Maintain optimal temperature and humidity levels. Use fans to improve air circulation and prevent mold.
Common Germination Problems and Solutions
Even with the best care, you may encounter some problems during the germination process. Here are common issues and how to solve them:
Seeds Not Germinating
If your seeds are not germinating, consider the following factors:
- Old or Poor-Quality Seeds: Ensure you are using fresh, high-quality seeds.
- Incorrect Moisture Levels: Ensure the germination medium is moist but not waterlogged.
- Temperature Issues: Maintain a consistent temperature between 70-85°F (21-29°C).
Seedlings Damping Off
Damping off is a fungal disease that affects young seedlings, causing them to wilt and die.
- Solution:
- Ensure good air circulation.
- Avoid overwatering.
- Use sterile growing medium and equipment.
Seedlings Stretching
Seedlings may stretch and become leggy if they do not receive enough light.
- Solution:
- Move the lights closer to the seedlings.
- Ensure the seedlings receive 18-24 hours of light per day.
Nutrient Burn
Nutrient burn can occur if the seedlings are fed too much fertilizer.
- Solution:
- Flush the growing medium with plain water to remove excess nutrients.
- Reduce the strength of the nutrient solution.
Root Rot
Root rot is caused by overwatering and poor drainage, leading to the decay of roots.
- Solution:
- Allow the soil to dry out between waterings.
- Ensure pots have adequate drainage.
- Use a well-aerated growing medium.
Advanced Germination Techniques
For experienced growers, advanced germination techniques can enhance success rates and plant health.
Scarification
Scarification involves lightly sanding the seed coat to improve water absorption and germination rates.
- Materials Needed:
- Sandpaper
- Steps:
- Gently rub the seed coat with sandpaper.
- Proceed with your chosen germination method.
Stratification
Stratification involves exposing seeds to cold temperatures to mimic winter conditions, breaking seed dormancy.
- Materials Needed:
- Refrigerator
- Moist paper towel
- Plastic bag
- Steps:
- Place the seeds in a moist paper towel.
- Put the paper towel in a plastic bag.
- Store the bag in the refrigerator for 1-2 weeks.
- Proceed with your chosen germination method.
Using Hydrogen Peroxide
Hydrogen peroxide can be used to disinfect seeds and improve germination rates.
- Materials Needed:
- Hydrogen peroxide (3%)
- Water
- Container
- Steps:
- Mix one part hydrogen peroxide with ten parts water.
- Soak the seeds in the solution for 30 minutes.
- Rinse the seeds thoroughly with plain water.
- Proceed with your chosen germination method.
Preparing for Germination: The Pre-Germination Checklist
Before you start germinating your marijuana seeds, it’s essential to ensure you have everything prepared. This section will cover all the necessary preparations to set the stage for successful germination.
Selecting the Right Location
Choosing the right location for germination is crucial. The area should be:
- Warm: Maintain a temperature between 70-85°F (21-29°C).
- Dark: Seeds germinate best in a dark environment.
- Clean: Ensure the area is clean to prevent mold and pests.
Gathering Materials
Make sure you have all the necessary materials ready. This includes:
- Seeds: High-quality marijuana seeds.
- Germination Medium: Paper towels, water, plates, or starter cubes.
- Containers: Glass for soaking method or pots for direct planting.
- Labels: To keep track of different strains if you are germinating multiple varieties.
Setting Up Your Germination Station
Create an organized germination station to keep your materials and seeds in order.
- Designate a Space: Choose a spot that can remain undisturbed during the germination process.
- Prepare the Environment: Ensure the area is clean and set up any necessary equipment such as heat mats or humidity domes.
- Organize Materials: Keep all your germination materials within reach for easy access.
Germination Methods in Detail
Paper Towel Method
The paper towel method is widely regarded for its simplicity and effectiveness.
- Materials Needed:
- Paper towels
- Two plates
- Water
- Steps:
- Wet the paper towels and wring out excess water.
- Place the seeds between the damp paper towels.
- Put the paper towels between two plates to create a dark, moist environment.
- Check the seeds daily, keeping the towels moist until the seeds sprout.
Soaking Method
The soaking method involves placing seeds in water to encourage germination.
- Materials Needed:
- Glass of water
- Steps:
- Fill a glass with water at room temperature.
- Drop the seeds into the glass.
- After 24-48 hours, the seeds should have cracked open, and you may see a small root.
Germination Environment Control
Temperature Control
Maintaining the right temperature is crucial for successful germination.
- Ideal Range: Keep the temperature between 70-85°F (21-29°C).
- Heat Mats: Use heat mats to maintain consistent warmth, especially in colder climates.
Humidity Control
High humidity levels help keep the seeds moist during germination.
- Ideal Range: Maintain a humidity level of 70-90%.
- Humidity Domes: Use humidity domes to create a controlled environment. Open the domes periodically to allow fresh air exchange and prevent mold.
Airflow and Ventilation
Proper airflow and ventilation are necessary to prevent mold and mildew.
- Fans: Use small fans to circulate air gently around the germination area.
- Ventilation: Ensure the germination space has adequate ventilation to provide fresh air.
Transplanting Germinated Seeds
Once your marijuana seeds have successfully germinated, the next crucial step is to transplant them into their final growing medium. This process must be done carefully to avoid damaging the delicate seedlings.
Preparing the Growing Medium
- Choose the Right Medium: Select a high-quality soil, coco coir, or hydroponic medium suitable for cannabis plants.
- Moisten the Medium: Ensure the medium is moist but not waterlogged.
- Containers: Use pots with good drainage to prevent water accumulation.
Transplanting Steps
- Handling Seedlings: Handle the seedlings gently by their leaves, not the stem, to avoid damage.
- Creating Holes: Make small holes in the growing medium using a pencil or finger.
- Planting: Place the seedlings into the holes, ensuring the roots are covered and the seedling is stable.
- Watering: Water the seedlings immediately after transplanting to help them settle into their new environment.
Initial Care for Transplanted Seedlings
Providing Light
Light is critical for the growth and development of cannabis seedlings.
- Light Duration: Provide 18-24 hours of light per day during the seedling stage.
- Distance from Light: Position the lights about 2-3 inches above the seedlings to ensure they receive adequate light without burning.
Nutrient Management
Proper nutrient management is essential for healthy seedling growth.
- Starting Nutrients: Begin with a diluted nutrient solution specifically designed for seedlings.
- Gradual Increase: Gradually increase the nutrient concentration as the seedlings grow.
Watering Practices
Effective watering practices are crucial for seedling health.
- Frequency: Water the seedlings when the top inch of the soil feels dry.
- Method: Use a spray bottle or gentle watering can to avoid disturbing the young roots.
Troubleshooting Common Issues
Even with the best care, seedlings can encounter problems. Here are some common issues and solutions:
Yellowing Leaves
Yellowing leaves can indicate nutrient deficiencies or overwatering.
- Solution: Adjust the nutrient solution and ensure proper watering practices.
Wilting
Wilting can be a sign of underwatering, overwatering, or root issues.
- Solution: Check the moisture level of the growing medium and adjust watering practices accordingly.
Stunted Growth
Stunted growth is often caused by inadequate light or nutrient imbalances.
- Solution: Ensure the seedlings receive sufficient light and adjust the nutrient solution as needed.
Advanced Seedling Care Techniques
For experienced growers, advanced techniques can enhance seedling growth and health.
Low-Stress Training (LST)
LST involves gently bending and tying down branches to promote horizontal growth and increase light exposure.
- Steps:
- Gently bend the main stem or branches.
- Use soft ties to secure the branches in place.
- Adjust the ties as the plant grows.
High-Stress Training (HST)
HST involves techniques like topping or fimming to encourage bushier growth.
- Topping: Cut the main stem above the fourth or fifth node to encourage side branch growth.
- Fimming: Pinch off the top of the plant to promote multiple main colas.
Pruning
Pruning helps improve air circulation and light penetration, promoting healthier growth.
- Steps:
- Remove any yellowing or damaged leaves.
- Trim lower branches that receive little light.
Preparing for the Vegetative Stage
Once the seedlings are well-established, they will enter the vegetative stage, where rapid growth occurs.
Increasing Light Intensity
As the plants grow, they will require more intense light.
- Adjust Lights: Gradually increase the light intensity by lowering the lights or increasing the wattage.
Nutrient Adjustments
The nutrient needs of the plants will change as they grow.
- Vegetative Nutrients: Switch to a nutrient formula designed for the vegetative stage with higher nitrogen content.
Training and Pruning
Continue training and pruning to shape the plants and promote healthy growth.
- LST and HST: Continue with low-stress and high-stress training techniques as needed.
- Pruning: Regularly prune to maintain good air circulation and light penetration.
Conclusion
Germinating marijuana seeds is the first and one of the most crucial steps in growing healthy cannabis plants. By understanding the different types of seeds, selecting high-quality seeds, and providing the right conditions for germination, you can ensure a high success rate. Whether you choose the paper towel method, soaking, direct planting, or starter cubes, each method has its advantages. Proper care during the seedling stage, including adequate light, nutrients, and monitoring, will ensure your plants grow strong and healthy.
Advanced techniques such as scarification, stratification, and the use of hydrogen peroxide can further enhance germination success. Once the seeds have germinated, careful transplantation and continued care during the seedling stage will set the stage for a successful vegetative stage and ultimately a bountiful harvest.
This comprehensive guide should provide you with all the information you need to successfully germinate marijuana seeds and care for your seedlings, setting the foundation for a successful cannabis growing experience.